Hands up who wants perfect skin? I bet 90% of us think about it, dream about it and actively do something about it!
Our face is the first thing people see upon introduction and I know when I am having a bad skin day, it is definitely on my mind with every person I meet that day.
Redness to pimples, dark circles to pigmentation, we have all had one or more of these concerns from time to time. The good news is, with the right tone of concealer to counteract the concern’s pigment, the area will look softened and less visible to the eye.
Working with A-List clients, as I have over the years, made me realise one thing: they are just like us. They too have these concerns and it takes a makeup artists’ knowledge to cover them up.
Lesson one: Know your Tone
Understanding tones and how they could be used to minimise other unwanted colours on the skin is a vital part of makeup artistry.
Your own skin under tone can help determine how much of these ‘colour correcting’ tones you may need as certain skin tones can lean generally more to one or two of min skin concerns compared to the other.
Fair Skin
- Usually a lot of pink/redness present and dark circles have more blue tone coming through
- The veins at the back of your wrist will be of a blue tone
- If pigmentation is present, it will be a light, sometimes grey pigment on the skin
Olive Skin
- Usually can have deep pigmentation, being an already yellow-base skin tone
- Dark circles will more a deep purple than blue tone
- The veins at the back of your wrist will be of green tone
There are usually three main categories of colour correction…
Dull Skin – Common with Asian and mature skin as it looses colour and therefore can look flat
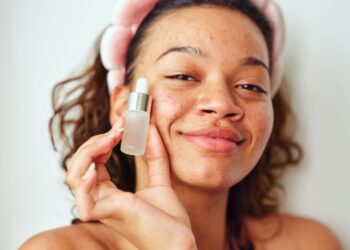
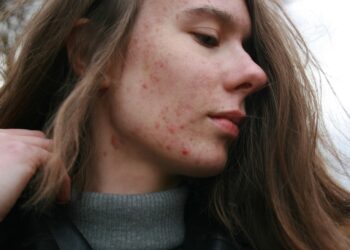
Redness – This can include blemishes, but also sensitivity causing skin conditions like broken capillaries or rosacea.
Pigmentation (including Dark Circles) – When areas of your skin darken, almost like a bruising (dark circles) or over production of melanin.
Any sound familiar? I am sure so many can relate to these concerns and I am here to tell you that your daily foundation shade is not enough for full results.
Hence why makeup artists don’t just use one concealer, they generally have a palette with several shades to then mask away these concerns by using different undertones for each one.
Lesson Two: 50 Shades of Colour Correction
Your daily foundation can work perfectly on your actual skin tone, but place it over pigmentation or dark circles and the area may look grey.
Redness may need a stronger pigment to what your foundation can offer to mask it away.
Nine times out of ten, your concealer and foundation won’t match in colour as they are used for different parts of the face.
Always correct what is visible for the area it is in, and then your foundation acts as a sheer veil to smooth everything over.
Dull Skin
For dull skin start with prime and illuminate products.
If the skin is flat, then you place a foundation over the top (unless it is a pink undertone, which will not work for everyone) it will still look flat.
I prefer to find a primer with an illuminating element – one with an opal, lilac or pinky hue to bring instant brightness to the skin, adding glow, before foundation application.
This will bring light to any foundation applied over the top so your skin looks fresh and bright.
Dull skin also relies on other makeup products for a lift.
Try a pop lip, a little blush on the apple of the cheek and, of course, adding extra highlight over the foundation to create light to the face.
Stay away from really neutral cheeks and lips and add a little colour like peach or pink to uplift your look.
MB PRO TIP; Highlight points on the face are the more frontal areas – Above cheekbone, peak of brow, in between eyebrows, cupids bow and chin.
Redness
This skin tone need neutralising and less colour used on the face.
We used to see lots of green sticks sold in makeup about ten years ago, as green would neutralise red – but it was an added step in application that the right shade of concealer can really achieve well.
Women with redness on their skin will often still wear pink blush and/or lipstick, when they should be eliminating all pink shades from their makeup bag and keeping everything of a neutral to warm/yellow tone to create balance.
This goes for foundation and concealer also!
A neutral foundation is perfect for someone with redness as the undertone has a lot of black and white pigment which, together, have a grey effect. This grey effect can mean neutral tones often look quite dull in their packaging, but that is perfect for a skin suffering from redness.
When looking for a concealer, find one with a bit of yellow. Whatever your foundation can not cover — a large blemish, broken capillaries or a sensitive, high colour part of the face — a concealer can be used over the top to mask and counteract the pink tones.
MB PRO TIP;
Massage your yellow pigment into area with a dabbing movement with ring finger. Tap pigment on area for concentration, then lightly around the edges for a perfect blend into foundation. Use a pin point when needed for coverage of a small pimple as your fingertip may be to large.
*Even though a yellow concealer may loo too dark for your skin tone or foundation shade, because the redness is underneath, with yellow on top, the two tones will balance and even out the area.
Pigmentation (Including Dark Circles)
The nature of pigmentation is that it has a deeper look to areas of the skin, so your daily foundation definitely will not cut it. In fact, more than likely, it will make the area go grey.
Pigmentation and dark circles both need an orange tone to smooth away the deeper difference to your skin. Orange has enough depth to counteract darker pigment, including that of the blue/purple tone of a dark circle.
Often the orange tone looks so much darker than your general foundation or concealer, but in most cases the orange concealer is used first, then foundation and highlighting concealer can be used on top.
You must always correct before you highlight.
For pigmentation on the face, similar to redness, I always use my ring finger and dab coverage on the area.
Dabbing is essentially layering coverage to build it up to where you need it and then dab around the edge of the area to create a smooth finish line for the area applied.
Once the area looks more even, continue with foundation as normal, but be careful not to sweep over the area you just applied concealer as it will weaken coverage, always dab – now the skin will look even in colour as you have corrected the concern before applying your foundation.
Dark Circles
For dark circles, it is the same principal — you cannot apply a lighter concealer thinking lighter is fresher. Lighter will not have enough depth to mask the dark circles, only make them look worse or grey.
Using your ring finger, dab the orange base pigment right on and only on the dark circle. Don’t use it all over eye, as it can look muddy.
The point is to counteract the blue/purple tone with orange so that when you use a brighter concealer shade over the top, the whole area is lifted and looking fresh.
MB PRO TIP;
The double concealer trick is a celebrity’s trick to mask dark circles with Step One: orange tone, then look bright and fresh with step two: a light concealer.
With makeup, opposites tend to work well…
– Use eye shadow opposite to your eye colour
– If you have redness in your skin, don’t use pink shades
– If you have blue/purple base dark circles, use orange to counteract the look of them
Now we know, use lilac/pink illuminators to brighten dull skin, use yellow to counter-act redness and then a deeper orange tone for pigmentation.
Practice makes perfect and it is all about that blend!
Follow Michael Brown: Website | Facebook | Twitter | Instagram


