There is nothing worse than leaving your lipstick on the side of your wine glass, particularly if you spent 10-minutes applying it with precision for a perfect pout!!
With the bright, bold and even neon lipstick trend becoming not just for runways or red carpets and being the choice for everyday wear by many women, it is important to get the best out of each lipstick application.
So, as a lover of a bright lip, I have some light to share on a bright subject – how to get your lipstick application down pat!


The bold lip is not really a new fashion trend as the tangerine lip has been a big hit over past summer seasons as well as the classic red lip, which made a huge come back last year. This past winter season was huge in deep plums, brick reds and even purple lips, which I loved, and now going into summer it is all about the fuchsias, watermelon and orange-based reds to brighten your day!
Anyone can pull off a bold lip, but you must wear it with confidence to wear it well, yes it may seem bright and that everyone is only looking at your lips, but at the same time it can do wonders for dull or tired-looking skin tones and really uplift a simple outfit into a balanced wow factor.
Fuchsia being the colour of the season is quite bright, but can suit any hair colour and skin tone.
Pale skins with blonde hair look great with this trend, it gives a fun, girly look, but as long as you correct any pink or reddish tones in your skin, it is a perfect match.
Olive tone skins quite often need a bit of brightening as they have a yellow undertone in their skin, so this trend is perfect to brighten their look.
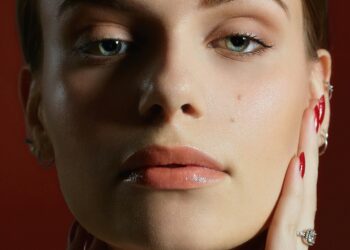
Take a look at these women, all different colouring, and all fab!

MB Pro Beauty Tip: Applying Lipstick Like A Pro Try and recognize what the main undertone is within your skin tone. What you see most, usually either yellow or pink, go opposite to that to always get it right! But, with the right foundation application to even out a skin tone, any colour can be applied.
So, now we know what wear, how to we keep it on?
First up, you need to have a nice moisturised lip, if not the lipstick formulas tend to stick to the dry areas, making them look dark, and then giving overall a patchy lip.
Also, the lipstick will not melt into the lip and create a ‘stain’ effect as the lip is too dry and will only sit on top.
The old style of lip application was to apply your lip liner first and then apply lipstick on top as it made lipstick last longer.
This is false as it wasn’t your lipstick lasing longer; it was your lip liner. Using this technique means your lipstick never actually touched the lip as the liner covered the area, leaving no stain effect or allowing the product to melt into lip, instead sitting on top of your liner.
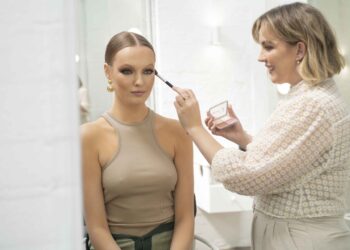
My best application that seems to work well for all my clients attending events, like the lovely Jesinta Campbell during the recent Spring Carnival are;
1. Make sure lips are smooth, moisturised, but not shiny with gloss.
2. Apply your desired bold lip shade with your fingertip, preferably the ring finger.
*This dabbing action is pressing pigment into the lip creating a stain as the colour melts into the area.
As you are dabbing, you can keep layering for a stronger, bold colour, or a light dab for a sheer version. This instantly locks lip to colour as they fuse together, letting nothing in the way of a strong hold.
** As your ring finger is rounded, it also creates a fuller pout, especially around the cupids bow, whereas a pencil or brush can give a sharper line, undercutting the lip and making it smaller.
3. Once colour is on in desired intensity, then use lip liner (if needed) to outline the lip shape – much easier to trace around the lip when colour is applied then when nothing is on the lip. *Lip liner shouldn’t be too dark; it should blend perfectly into lip colour.
If you are wearing gloss, only apply in the centre of lip, not entire area to avoid gloss build up in out areas of mouth or feathering.
This technique means less transfer from lip to wine glass or coffee cup, or to your partners face! This is because the pigment is pressed into the lip, not sitting on top of lip like it would be when applying with a brush or from the actual lipstick bullet.
Lip liner should not be the star product or the last thing you see on the lip, so by applying it last, you allow the lipstick to stain the lip skin and be the star!
This will help lipstick not get on your teeth also as you have once again pressed the colour in to the lip, allowing it to sit in, not on top, so less movement/transfer from the lip.
MB Pro Beauty Tip: When dabbing lipstick into lip, slightly move your ring finger to the left or right to cater for the smaller outer areas and then go back to front on dabbing with fingertip for larger areas. Also great for layering colours, as mentioned above, for creating larger pouts when top lip is smaller.
I love this affordable beauty from Miss Shop Cosmetics at Myer, with great bold colours in lips and nails!
Below: Miss Shop A Little Lippy in Pink $9.95

Another great natural ‘Green’ style bold lip option is from Aveda in Star Coral for the pink base skins to warm them up.
*Also works great as a cream blush, dab a couple of small dots on apple of cheek, then blend for a natural formula on the cheek.
Below: Aveda Lipstick in Star Coral $29.95
By Michael Brown
Twitter: @mbrown_beauty
Facebook: facebook.com/michaelbrownbeauty
You might also like…


