
Looking in the mirror and noticing areas of the face have dropped can make anyone feel a little down about getting older. As some celebrities have been seen showing, we can prolong ageing, and it doesn’t mean we will look lifeless and frozen. Looking younger is all in a few simple steps, a couple of techniques and some good products.
We may not be able to completely take away damage once there, but we can definitely help new concerns from appearing and enhance the skin we have now.
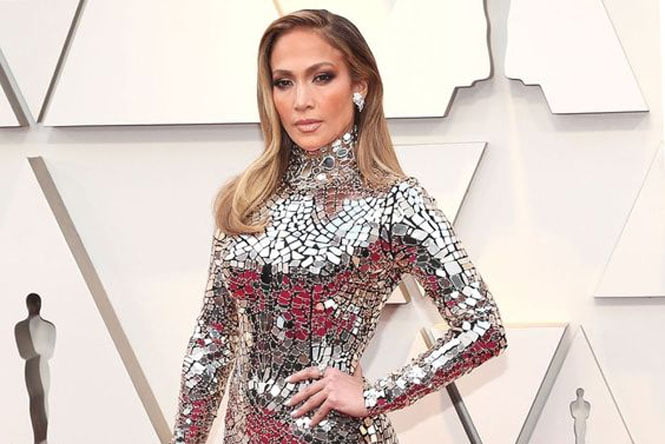 Image via pinterest
Here are my six steps to looking younger:
Step 1. Protect
Keeping the skin out of the sun and wearing SPF daily is so important as 90% of all skin ageing is sun related. With so much exposure in Australia it is hard to always be on top of it, but we do need to focus on this more to avoid more wrinkles as well as dryer and pigmented skin look. Foundations, BB Creams and Primers have become a savoir with higher SPF levels, providing added protection to your skin. Wherever you may get it from, definitely consider some form of SPF in your daily routine.
Step 2. Moisturise
Our skin can get very thirsty in Australia; we must continually give back what it loses during the day. The skin is much like a sponge, once wet it softens, plumps and generally has elasticity to move easily without leaving any evidence of it.
Depending on your age and skin type, sometimes just using a moisturizer is simply not enough. For anyone dehydrated or dry, with visible expression lines and wrinkles, use a serum underneath your moisturizer. It primes the skin, ready to accept the moisturizer about to be applied – just like a sponge; it absorbs spilt water easier once wet than dry.
*A little serum mixed into your foundation for extra slip on application works a treat, especially for a longer, more hydrated result.
Step 3. Conceal
I would say concealer is something every woman needs. The shade and consistency of the concealer is more important than the brand. As a Makeup Artist, I typically concealer under the eyes for dark shadows, eyelids to act as a base for eye shadow and then on the skin for any redness around the nose, chin and sometimes cheeks. It can be worn alone without foundation for a quick touch up, or over foundation when combining them together. Even if you never wear foundation, every one should be hiding dark circles and their red areas on the face to help look younger.
My main tip with concealer is to get the shade right. Most women go too light, but this can turn redness or dark shadows into a grey colour, because it hasn’t got any depth to cover the dark or red areas. Lighter skins need a peachy tone and olive skins need more yellow to orange base tone to actually eliminate these concerns. A dabbing application is much better so you can build the coverage over the problem area. Never apply the concealer directly to the crows feet or outer area of the eye, as this will crease later on during the day.
Step 4. Shape
Contouring is the best-kept secret of any makeup artist. It helps to gain lift and shape to the face, no matter what age you are. Highlight and shade is now a big part of makeup, it is the one technique that can instantly enhance and correct the face as well as be the base for when applying colour later on.
A highlight colour can bring an area of the face forward, making it appear larger. A deeper or matte tone can recede unwanted areas like puffiness or excess skin. Once you understand the principle and practice on your own concerns, choosing the right colour for your skin can be the technique you will ever use.
A bronzer, preferably matte, is a great shade style product to use for contouring. It should be applied under the cheekbone to recede round cheeks, or give a higher, more sculpted look. It’s also great used across the eyelids, mainly in the socket area, to give the illusion that the eyelids are firm with a strong brow bone. Highlighting in this area can enhance puffiness around the eye or make the eyes look smaller, especially in photography.
A highlighter can come in powder form, however I prefer using a liquid highlighter that can be dabbed into the skin. Use the product on the frontal bones to gain contrast from the shade tones and add some lift. Applying on top of cheekbones to give a radiant effect, cupids bow for more pout and under the peak of the brow can work a treat.
*Most women need more shade than highlight, especially around the eyelids when ageing is a concern.
Step 5. Define
A little liner and mascara can do wonders, especially if you have used the contouring tips from Step 4. However using eyeliner, especially in black, around the eyes with no blend can actually close your eyes. The harsh line pulls focus and if you are applying the liner in this way with no shadow to deepen the eye socket, the contrast of skin colour, being lighter, around the black line can close the eyes up.
The best tip to define and look youthful is to apply a thin line of eyeliner across the top lashes, then with a brush, gently smudge the line up, into the eyelid area to create a smokey look. The smokey eye look was so popular because it made the eyes larger. Having a deeper, rounded, soft edges using shadow helps create that look but only using the one product to save time.
The softer the edges and applying slightly more in the outer area of the eye will always give more lift and bigger eyes than using it harshly alone with no smudge. *Add mascara for better results.
Step 6. Colour
Now that our face is plump, even toned and structured correctly, we can have some fun with colour. What better way than a bright lipstick.
Don’t think that if we are maturing, we cannot wear a bright lipstick. It may not be the biggest, brightest on trend lip seen on a catwalk, but a brighter shade to suit your skin under tone can be the ultimate pick me up when looking flat.
Women who wear a brighter lipstick always look more youthful as it adds colour, instantly brightening the skin. Using the incorrect shade can age you, so make sure you’re picking the right colour for your skin.
Choose your lip shade depending on your skin tone – pink base skins should use warmer, summery tones and olive skins more wintery, blue base tones. If you’re confused on what may look good on you, remember there are a few different intensities of lipsticks on the market, so if you want a red, you can purchase a sheer version if the bold red is not your thing.
The best part of a bright lipstick (except when glossy) is that they are great for a little colour on the apple of the cheeks – a youthful touch of glow, which also plumps the area giving great radiance. Simply dab a little on the apple of the cheek and massage in until satisfied with the colour result.
So ladies, think about these 6 steps when applying your routine. They are simple once practiced and still time efficient with only 6 -8 products to focus on. Always remember to think why are you applying a product on the face what is it actually doing for you and always apply less on areas with expression lines to avoid any product build up.


